Do you like neon album covers and Make a Vaporwave Background? Today, I’ll show you how to create your own vaporware album cover in Photoshop utilizing shapes, channels, and gradients. Also, at the finish of the tutorial, you will track down an extremely valuable assortment of vaporwave album cover generators.
Kids those days love Tumblr. In fact there are a ton of Adobe Photoshop Might Soon Be Available things between all the burdensome stuff and committed fandoms, similar to the spreading of endless art/music/fashion patterns, for example, the Vaporwave development, which mixes renaissance models, innovation and a strong variety plan to bring the tasteful of an outdated future.
Whether it’s beautiful digital collages or representations of neon-lit roads, we can’t get enough of all the awesome vaporwave art that’s broad the internet Make a Vaporwave Background. Typically featuring blue, pink and purple tones, the vaporwave tasteful features images from the 80s and 90s blended in with misfire impacts and traces of trendy innovation. As far as the web is concerned, this retro-yet-present day visual art style is staying put, and we’re fixated. This is the way to utilize PicsArt photograph proofreader and collage maker to create your own special #vaporwave stylish photograph alter.
Stage 1: CREATING THE ARTWORK
1. Background
preparations
I, first of all, created a squared-size canvas, since the usual Compact disc boxes have squared shapes.
While you’re doing an idea, doing a sketch first is always better. In my case I composed what I wanted to do. It’s a decent way to not getting frustrated in that frame of mind of the work.
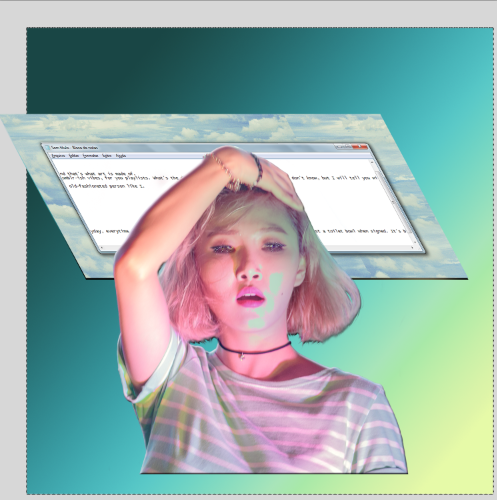
As that said, I started to paint my canvas, transforming the original background into a light gray tone (#d7d7d) to remind an old PC display, utilizing the keyboard easy route alt + backspace.
basis
To break that sad gray view, I chose a non-focused large square area utilizing the Rectangular Marquee Device and applied a gradient with a malachite variety conspire. Brilliant and beautiful.
Stage 2:
an awesome tip of randomness
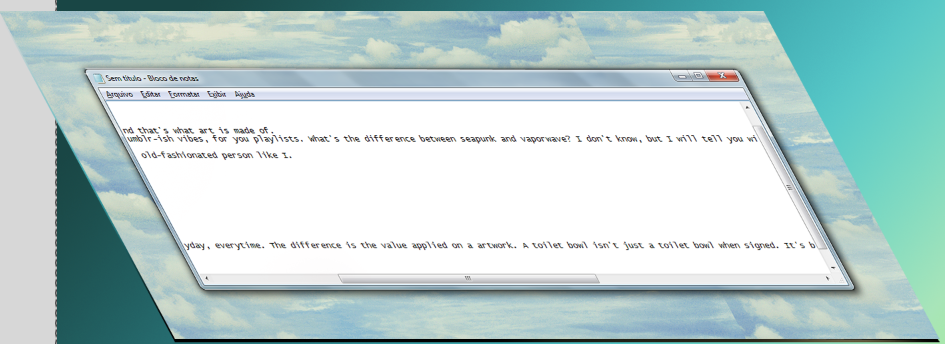
To stamp a mark at this piece, I picked a screen capture of my work area: here is some outdated innovation and a Parnassian feel got by the painted mists the background. Drag it to the Make a Vaporwave Background canvas. To this example I resized and slanted the image, utilizing the Transformation Device in Twist mode.
Stage 3: LAY FIGURE
The model
preparation
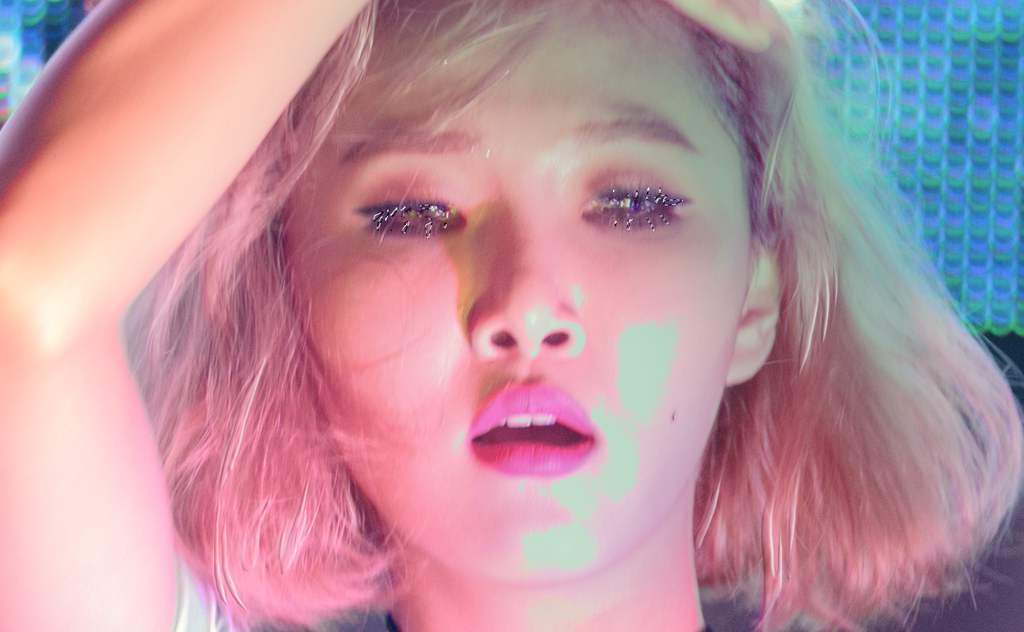
Vaporwave artworks generally utilize Greek statues to bring a classical atmosphere. In this structure, however, an individual picture will finish the work: for that I’m utilizing a CC (Creative Center) photograph from Peter Rowland’s Flickr.
Stage 4:

variety adjustments
Above all else I opened the photograph. The impacts were concentrated at the focal point of the frame, adjusting only her and nothing more because I will probably trim her by the outline toward the finish of the cycle.
Utilizing the alternate way Ctrl + J, I duplicated the image and transformed into Variety Mode to emphasize the original shades of the creation.
Stage 5:
a little stunt
As you already saw, I really prefer to utilize the Angle and Make a Vaporwave Background, so I combined all revisions made. Following that step I chose her collar and straws of her hair and created a duplicate layer by right-tapping on it and choosing Layer Via Duplicate. In this new layer, I applied the Slant and Embellish impact.
It’s a just impact, yet add a few significance and a kitsch feeling in the piece.
beating it out
At the present time the image looks pretty strong, however that’s insufficient when we treat about the Vaporwave development. Here is an easy way to break the tedium. To do that I chose a few straws of her lashes utilizing the Lasso Device and, in 100 percent of zoom, printed the screen.
Stage 6: Sewing THE Organization
Jointing the work
editing edges
Drop your photograph to the background recently finished.
Resize the image and apply to a decent size that doesn’t conceal the background and harmonizes with different components.
For that model, I created a Mask on the layer and Generally erased the edges, barring the background of the image.
more deceives
Presently two shots: to dehumanize and make a little taste of a statue on Hwasa’s cut, I painted the lower part of the image with the same blue as the illuminated parts of her shirt, utilizing the same default Delicate Brush as utilized previously.
Stage 7: THE TITLE OF THE PLAYLIST
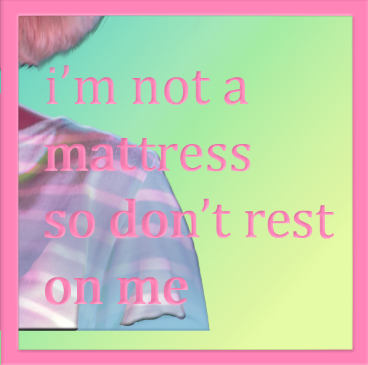
To finish up the art piece, I utilized two basically steps. In the first I made a case utilizing Movement + Rectangular Marquee Device. Then, at that point, I converged the container with another crate, utilizing Movement + Alt + Rectangular Marquee Device. To finalize I hued it pink (extracted from Hwasa’s skin) with Alt + Backspace.
After that, in the subsequent step, I composed the title of my playlist in Cambria inside the container utilizing the same pink tone. Combined it both and, think about what, Sloped again.
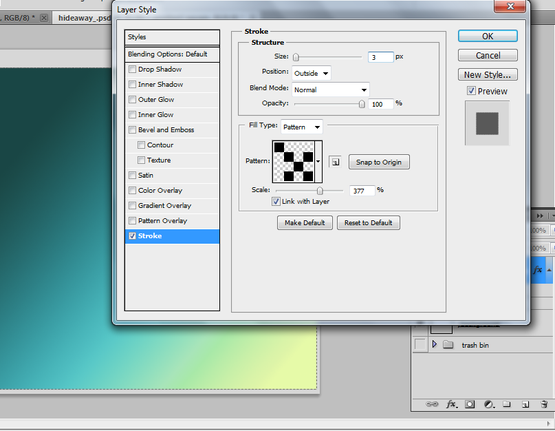
Stage 8: ADDING THE COVER
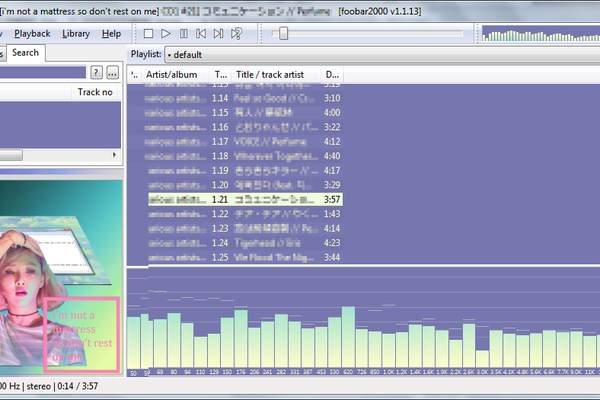
We should improve on things. You can get an album artwork in abundantly ways, however we would rather not do complicated things right? Install and open Mp3Tag. When you did that, drop your tunes to the large vacant area. Select all the documents, essentially doing the keyboard easy route Ctrl + A.
You will see the original front of the tune. On the off chance that it doesn’t have a cover, it will appear a white box with a circle in it. Right-click on that and select Add Album Cover. An Open box will appear, and you simply have to find the artwork you’ve done and press enter.