In the event that you have a fax modem associated with your PC, you can utilize it to transform your Windows 7 PC into a fax machine. The Remove Windows LQC Fax and Scan highlight, remembered for all duplicates of Windows 7, permits you to scan, fax and get records.
For a business, this permits you to reduce down on expenses; rather than buying a different fax machine, you can utilize one of your office while removing widgets from home screen as one. At the point when you never again need to involve the PC as a fax machine and need to handicap that capability, you can do so straightforwardly from inside Windows 7.
Reinstall your HP printer utilizing the most recent variant of the full programming highlights on HP site, ideally in the usb association. Test the printer or use HP diagnostics to test its activity, then uninstall HP printing through programs and highlights programming.
Change the settings in the Scanner Setup discourse box, if necessary. The scanner goal can be set to a limit of 1200 dpi. If you have any desire to scan at higher goals, utilize the Remove Windows LQC Fax and Scan Utility programming of Brother Utilities. On the off chance that your machine upholds 2-sided Scan and you need to scan the two sides of your report, select Feeder as Source.
How to Turn Off a Microsoft Fax
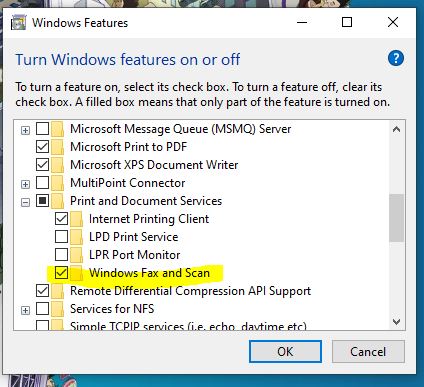
- Click “Begin | Control Panel | Programs | Turn Windows Features On or Off.” The Windows Feature exchange box loads.
- Click the “+” sign close to “Print and Document Services.”
- Uncheck the crate close to “Windows Fax and Scan.”
- Click “Alright” to save your changes.
How to Enable LQC Fax and Scan
On the off chance that you have a fax machine in your private venture and you get a blunder when you endeavor to send or get a fax, despite the fact that you realize the fax machine is appropriately associated with your PC, the Remove Windows LQC Fax and Scan administration probably won’t be introduced on your PC. Regardless of whether it is introduced, the Fax administration may be crippled. To have the option to send and get faxes, you really want to introduce and empower the Fax administration.
- Click the Windows “Begin” symbol and select “Control Panel” to open the Control Panel window.
- Click “Projects” to explore to the Programs segment.
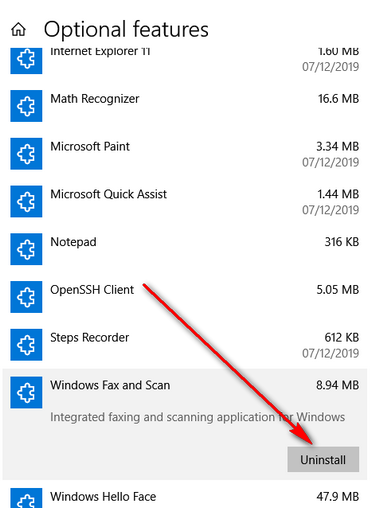
- Tap “Projects and Features” to see a rundown of all introduced programs and extra choices.
- Click “Turn Windows highlights on or off” in the passed on sheet to open the Windows Features window.
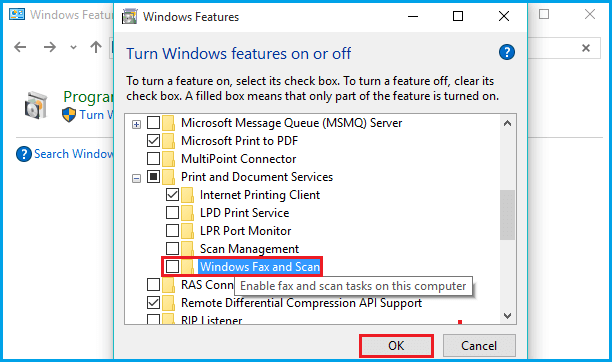
- Expand the “Print and Document Services” hub by tapping the little “+” symbol before it.
- Place a mark before the “Windows Fax and Scan” choice, click “Alright” and hold on until Windows 7 introduces the Fax administration.
- Click the Windows “Begin” symbol and type “Administrations” in the Seach field to look for the Services utility.
- Click “Administrations” in the query items close to the top of the Start menu to open the Services window. All administrations, empowered and debilitated, are shown in this window.
- Right-click the “Fax” administration and select “Begin” from the setting menu to empower the Fax administration.
Windows FAX and SCAN mistake reports – demand server name. How to find the server name?
How might I at any point track down the name of the server to send email utilizing Remove Windows LQC Fax and Scan.
Hello DonaldCombes,
- is it safe to say that you are ready to utilize it prior?
- What is the specific blunder message you get?
- don’t you cause changes to happen the PC before the show?
Attempt to utilize the complete name of your Pc name of the server.